A Quick Bathroom Redo


Check out this great post from my niece Nicole. I just love what she has done to her bathroom. As a family, we love sharing decorating ideas. Happy Decorating, Kathy

My husband and I moved into a newly built home about three years ago.  When we moved into the house I didn't have many ideas for decorating.  We put up some of the stuff from our previous home, but I really liked the plainness of the new home.  I felt like I needed time in the house to really decide what I wanted to do. Fast forward to now and I am in all out decorating mode.  I don't really want to take on any huge projects, but there are definitely things we can do to get rid of the "builder grade" feel.

Over the last couple of months, I have swapped out the foyer and stairwell chandeliers.  After that, it was time to tackle the main floor half bath.  I liked the color of the walls already (Sherwin Williams Latte) and just like my Aunt Kathy, I love the show Fixer Upper. I tried to think like Joanna Gaines and how I could give it more of the rustic feel.  We swapped out the builder grade light fixture with a new brown toned fixture from Lowes.  I matched the brown tones to a new reclaimed wood looking mirror that I found at Kirklands.  
Above the toilet, I added a wood pallet sign that I painted during a session at "When Pigs Fly" in Fredericksburg.  If you haven't checked this paint studio out, you should.  It is so much fun.
On the back wall, I didn't want to have too much white, so I found this decorative wood wall decor at Kirklands.
The shelf that sits on the floor was actually a house warming gift from my Nanny (our inspiration behind this family blog).  I didn't want to paint the shelf, so I focused more on the décor placed on it.  I already had some of the items on the shelf and a couple I found on my trips to Target and Home Goods(two of my favorite stores). I think it turned out great and it is a little reminder of my Nanny every time I see it.


The bathroom is done…nothing too crazy and over the top. Just a few pieces can completely change the look and feel!  I'm happy with the way it turned out.  And the best part... it didn't cost a lot. What room can I change next?

HAPPY SPRING!

I don’t know about you all, but when the warm weather hits it makes me want to change things in my house. Over the cold winter months, I found myself watching a little too much HGTV. I will happily admit I am obsessed with the show “Fixer Upper” and not too proud to say that I even watch the reruns. I love the decorating ideas and inspirations I get from Joanna Gaines. I had been dreaming about making some changes to my powder room bath on the main level and the mud room off the garage. Since we were having our kitchen cabinets painted, I decided to have the bathrooms done as well. If you have ever read the book by Laura Numeroff  called “If You Give a Mouse a Cookie” then you will totally get what I am about to say. If you paint the kitchen cabinets then you have to paint the bathroom cabinets. If you paint the bathroom cabinets then you have to paint the walls. If you paint the walls then you have to paint the ceiling and the baseboards. If you paint the ceiling and the baseboards you have to have a new toilet. If you get a new toilet then you have to have new accessories. Ok Ok… I know you understand what I mean. One project always seems to turn into ten projects. However, if you ask my husband he will tell you it seemed like way more than ten. We even did a little DIY project and refurbished an old entertainment console that I picked up at the Goodwill for $20.00.The photos were taken on my phone so I apologize that they are not the best. My niece is the photographer, but she was busy and I had to take the pictures myself.
Here are a few photos of what the bathroom looked like before. My décor was very country.
Here a few photos of what the bathroom looks like now.
My husband made the cool shelves above the toilet and the cute prints on the wall came from a store called And That… 
Here are a few “before” pictures of my mudroom. It was very “Americana” as you can tell from the photos.
It is still a work in progress, but I love how it is turning out.
Here is the console and a tutorial of what we did.
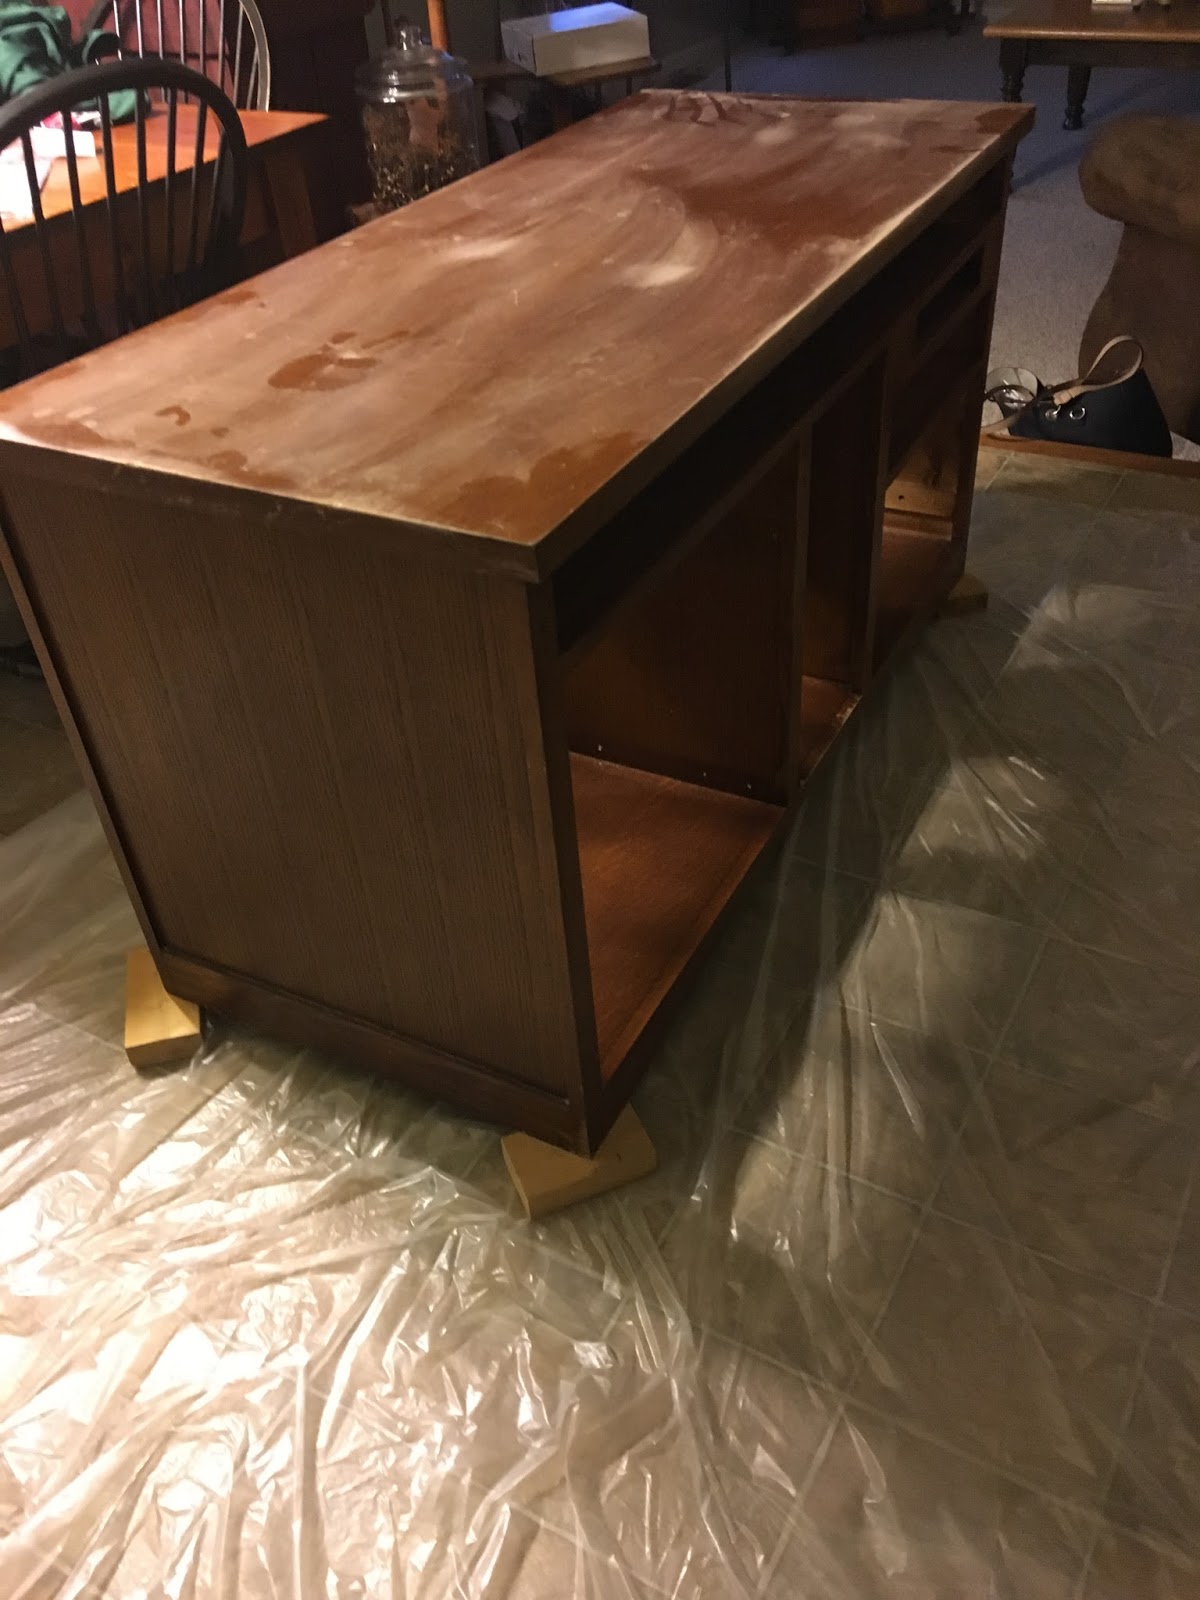
1.     Here is what it looked like when my husband took it out of the car. At the top right corner you can see where the old gaming systems would connect. My husband simply popped it out and left the space empty. He jokes and calls it a mail slot, but it is where I am going to put our many remotes.
2.   The next thing we did was remove the drawers, the fronts and their hardware. Getting these things removed makes it easier to paint.
3.   Here is the back view.
4.   We removed the back and my husband made a new back out of some old plywood.
5.   He thought it needed a light sanding, but I actually think it would have been fine either way.
6.   We don’t usually paint furniture and do projects like this in our kitchen, but we were having such rainy weather, that we thought it was too humid outside.
7.    I highly recommend that before you paint any piece of furniture (unless it is bare wood that has never been painted or stained) that you prime it first. Our go to primer is by “Zinsser” and it can be found at Home Depot.
8.   After a nice coat of primer your furniture is ready to paint.
9.   Here it is painted. I used Behr paint, found at Home Depot, in Swiss Coffee for the bottom. The top in this picture only has one coat and as you can see we had to apply two coats. The top is also a Behr paint called Havana Coffee.
10. The finished project. The total cost of this project, including the entertainment center was under $50.00, so I think that is a WIN!! 

Thanks for stopping by!
Happy May~

Kathy